
This tutorial is based on my previous post about the Purse Organizer I made for myself, where a lot of you asked if I would accept orders (which I dont..sorry T__T) .. I did promise a tutorial in the end of the post..so here it is..
I will try to use 100% english (just in case I've got some readers who cant understand malay :) *perasan mode*) and because of that, there will be a ridiculous amount of pictures (74 to be exact) coz my writing, not so good T__T
I hope you guys can understand this tutorial...enjoy :)

of course you need all the essentials :) + one short zipper (6"), one long zipper (12")

1- draft out the pieces you need based on your bag (mine is drafted based on my LV Delightful PM)
my measurements will be L x W x H = 12" x 5' x 5.5"
piece A = (L + H + H + 1") x ( (W+2") / 2 ) = 24" x 3.5"
piece B = (L + 1") x (H + 1") = 13" x 6.5"
piece C = (L + 5") x H = 17" x 5.5"
piece D = (L + 1") x H = 13" x 5.5"
piece E = (L + H + H + 2") x 4" = 25" x 4"
2- cut your material based on pieces (I'm using both heavy cotton (main fabric and lining) for the organizer):
piece A = 2 main fabric , 2 lining
piece B = 4 main fabric , 4 lining
piece C = 2 lining
piece D = 2 main fabric , 2 lining
piece E = 3 lining
3- preparing the exterior part of the organizer

on piece D main fabric , mark the place where you want to put the zipper


image 3a(2)
Insert the zipper

after inserting the zipper, sew on top of Piece D main fabric and lining right sides together with 1/4" seam


press open and top stitch


do the same with the remaining Piece D (skipping the zipper part)
now you have 2 completed piece D
place the completed piece D on the Piece B main fabric - sew the part where you would like it to be separated ( mine are as above - click for larger image)
sew 1/4 seam allowance at every corner
now you have 2 completed exterior piece
4- preparing the interior part of the organizer

Piece C - fold 1/2" and sew - press

place piece C on top of piece B lining (align bottom part together)


mark where you want the separator to be ( here you must u can customize according to what you want to have in you organizer ) , make sure the top piece is 1/2" bigger than the bottom piece

pin and top stitch


this is how I made my separators or compartments, fits my phone, camera, glasses, pens and some other stuff

after you are happy with the separator, sew 1/4" to close bottom, you will need to fold a bit to make it neat
5- putting the interior and exterior pieces together to make the SIDE PIECE of the organizer

now you have 2 complete sets (4 piece) of the interior and the exterior part of the organizer

sew top part of interior and exterior piece right sides together, open and press, top stitch (do both sets)
now you have 2 piece of the sides of the organizer
6- making the center piece


sew Piece B lining and main fabric right sides together with the right side of the zipper facing main fabric
turn and press

now repeat the same on the other side of the zipper (B lining, zipper, B main fabric)

fold open - press - top stitch

place right sides together for both main fabric and lining and sew 1/4 seam on the bottom part of the fabric (please refer to the arrow in the above picture)


turn the piece so that the lining is inside, sew 1/4" seam at both sides (its ok if it looks messy coz we're going to cover up it later)

now you have all 3 piece of the organizer
7- combining all 3 pieces

sew Piece A lining and main fabric right sides together - turn - press - top stitch (JOINING PIECE)

pin SIDE piece with JOINING piece - lining side together, sew 1/4" seam

this is what you will get...

* its ok if the sides are curved *

pin the first piece above, CENTER piece and the 2nd JOINING piece together and sew 1/4" seam (make sure the lining is inside)

and this is what you will get..
attach the last piece of the SIDE piece to the above and tadaaa...

you're 90% done :)
8- completing the organizer
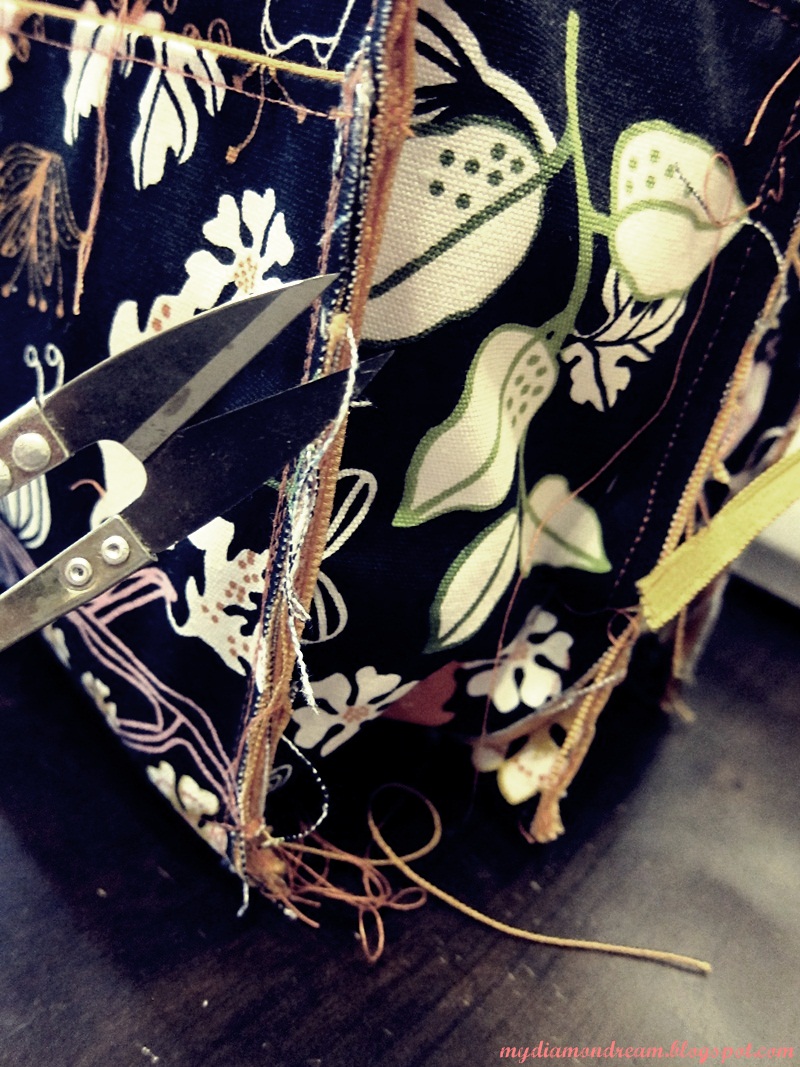

snip off the extra threads and fabric , tidy up the edges


fold Piece E and press as above picture (like a bias tape)

hand stitch the tape to the edges (if your machine is heavy duty- go ahead and use ur machine)


AND YOU'RE DONE !!!!
fuhhhhhhhh..... that was a challenge...heeee... hope you guys understand the tutorial...
good luck!!
ps : this tutorial is for personal use only... and if you want to share the tutorial , please credit/link it back to my page... thankss :)
loadsssss of love,
Aisyah Samsudin
4 comments:
baca pon penat. tapi nak buat mmg tak dan lah. suke tengok je. ;p beli beg yang banyak compartment jelah sng canii.. T_T
nice tutorial! sangat detail :)
Babe, bestnya tgk u rajin jahit.. Cannot make extra ke? :P
Kagum tgk tutorial ni. . .
Post a Comment